


Hi friends! I had a great response to my Instagram and Facebook posts about my math choice board so I thought I’d share with you how to use it in your classroom.

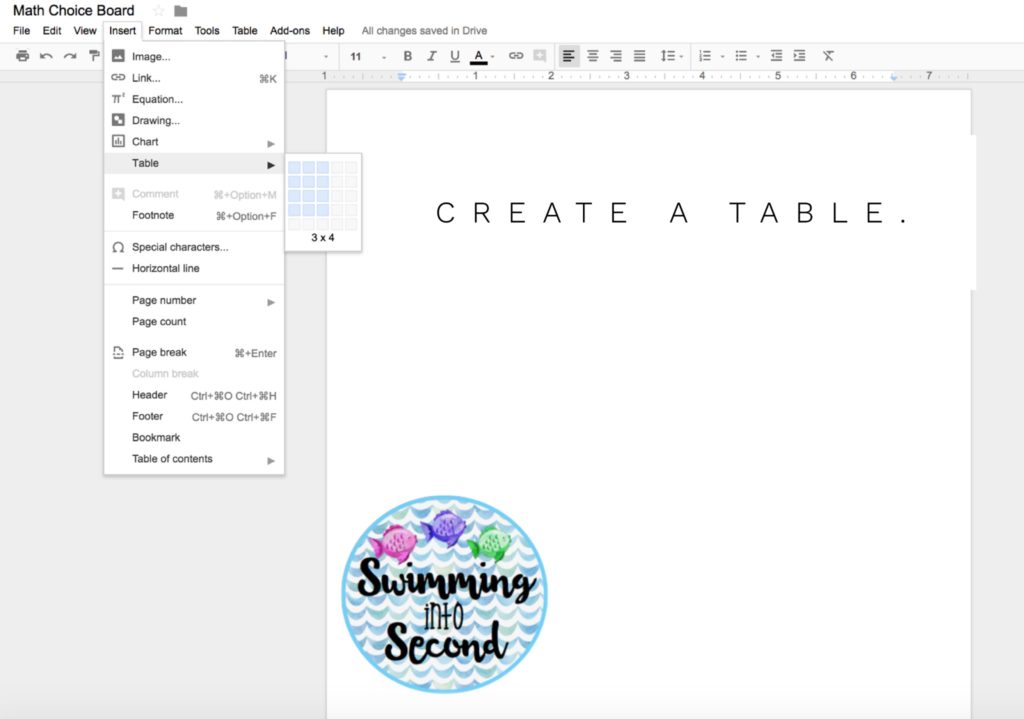
If you haven’t used Google Docs before, it is so easy to use and share. After you create a new Google doc, create a table within the doc. Go up to Insert and scroll down to Table. Choose the size of the table that you want. You can always add more rows or columns later.
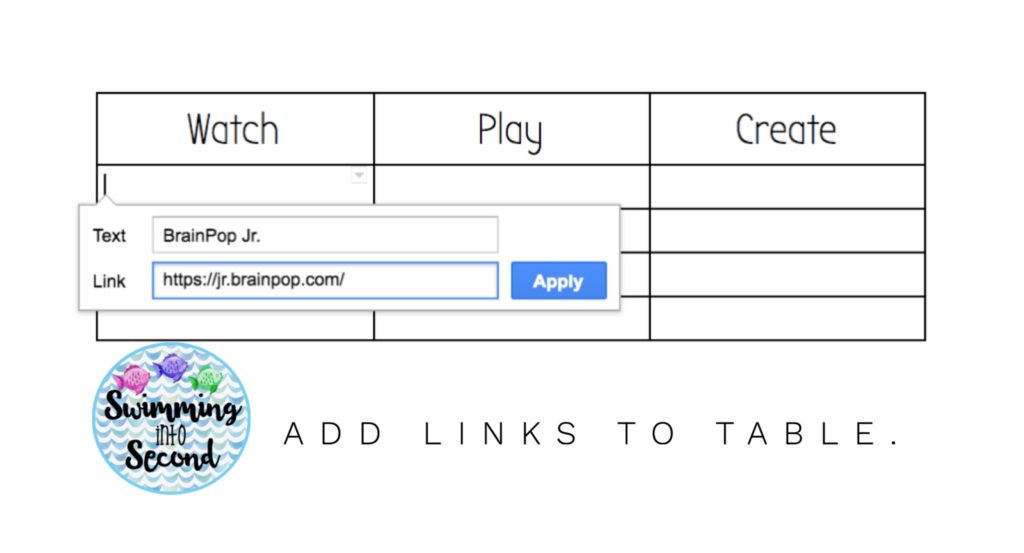
After you insert your table, find links that you want to share with your students. Consider videos, subscription links, or games. I also share my Seesaw link with them so students can easily add assignments to their account. If our subscriptions have logins that are common for the whole school, I include them in the table.
If my students have unique logins for the website, I have these on a login loop on their chair.

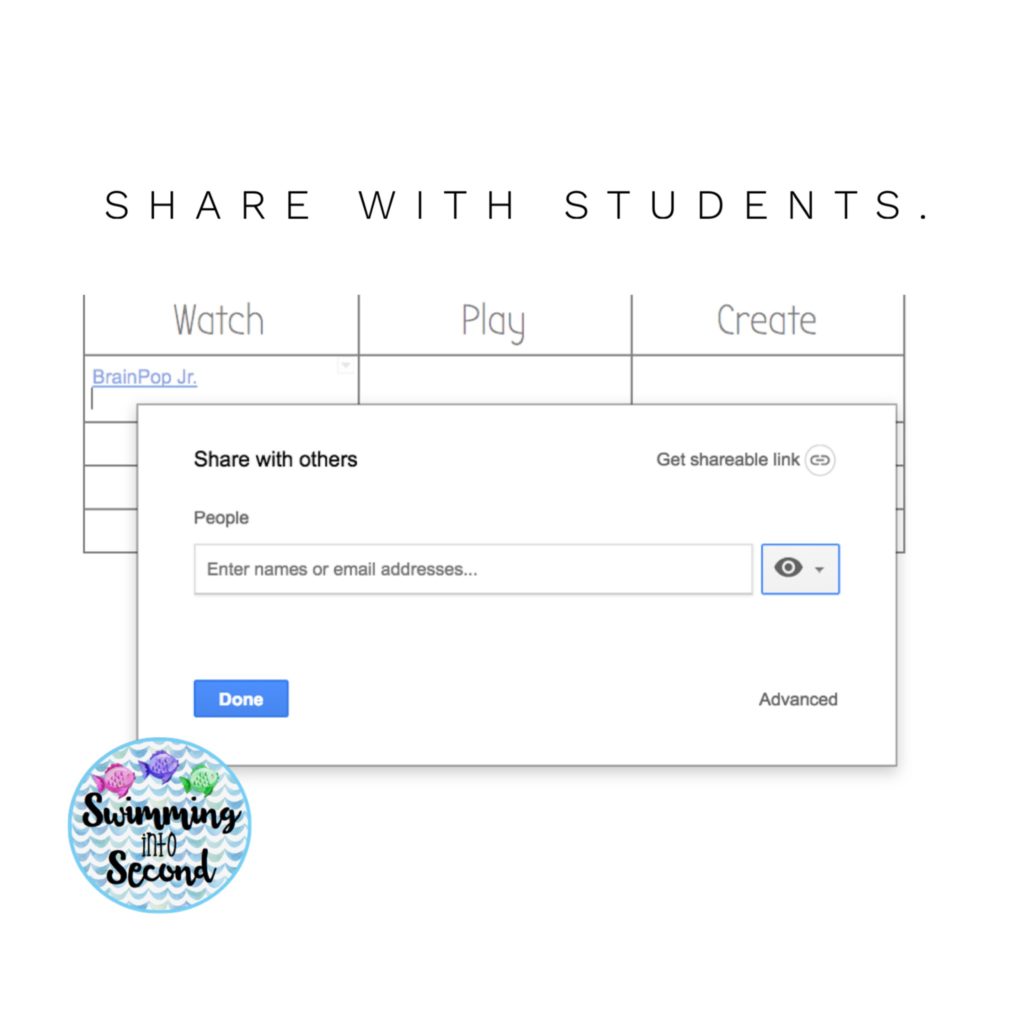
Now, share this table with your students. In my district, my students don’t have emails but have Google accounts with their student id numbers. I can share with them this way. You can also easily share a link to the document with your students. I make sure that this choice board is not editable by my students so they don’t accidentally change the links. You can make it only viewable (where they can also click on the links) by changing the image beside where you enter their emails. The eye stands for viewable.
Once you share the doc with your students, it shows up in their Google Drive under the “Shared with Me” tab.
Once I’ve shared this with my students, I can go in and change the links each week and they still have it in their Google Drive. (Be sure to make a copy of the original each week for yourself so you don’t have to redo the links each year.)
Hope this helps your math rotations run smoothly! This would be a great way to differentiate content with your students by sending out different choice boards to different students.
